三、Laravel简单操作技巧
1.Composer
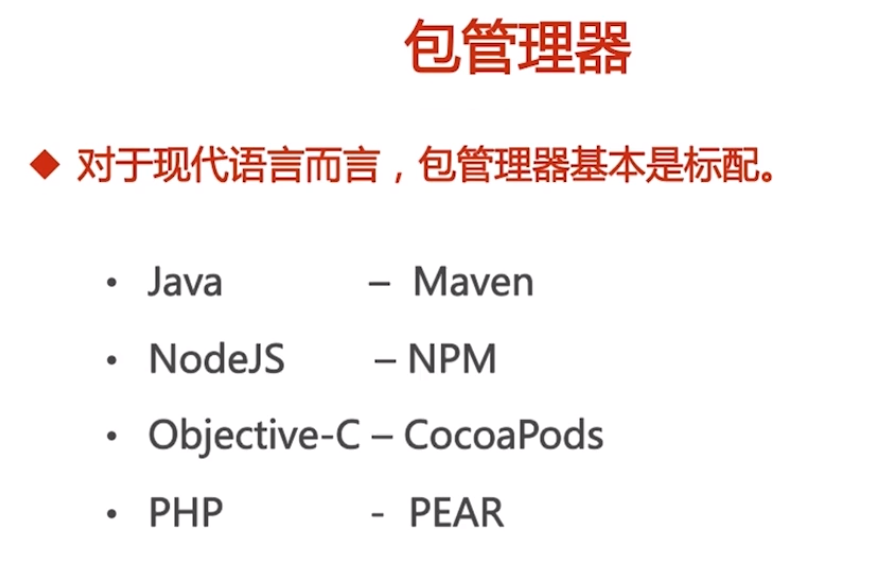
1.包管理器
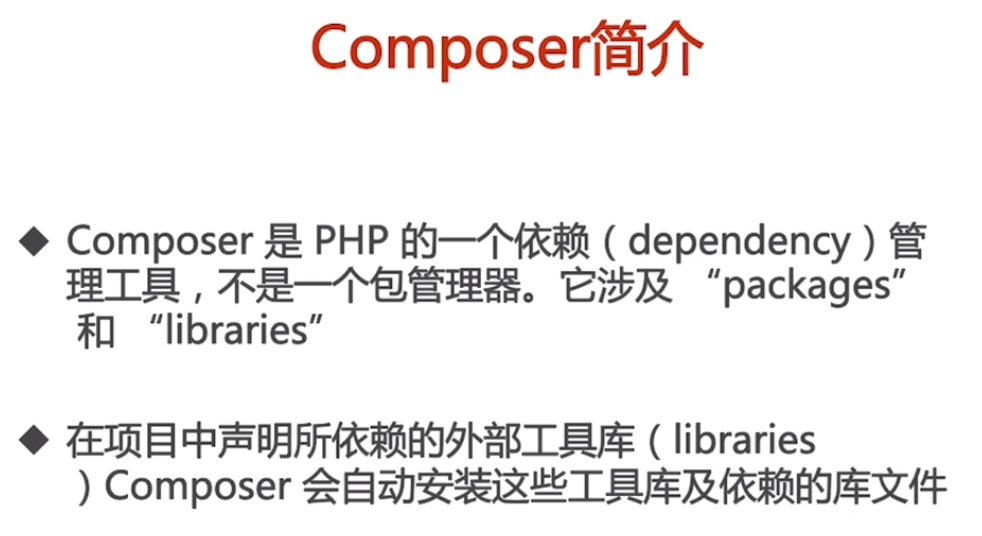
2.Composer
3.安装


4.镜像

使用Composer中国全量镜像服务作为本地项目的依赖管理工具的下载中心会更快。
5.使用Composer
1
2
3
4
5
6
# 创建配置文件以及初始化
composer init
# 搜索某个库
composer search monolog
# 查看库的信息
composer show --all monolog/monolog
添加库:
在配置文件composer.json中添加依赖和版本:
1
2
3
"require": {
    "monolog/monolog": "2.21.*"
}
1
然后用`composer install`下载依赖,之后打开`vendor`目录,库将会下载在里面。
也可以用composer require声明依赖,它也会自动添加、下载、安装依赖:composer require symfony/http-foundation。
删除依赖:只需在composer.json删除对应的依赖,然后执行composer update即可。
6.使用Composer安装Laravel
composer create-project --prefer-dist laravel/laravel <别名>- 先安装Laravel安装器:
composer global require "laravel/installer", 再通过安装器安装框架:laravel new blog
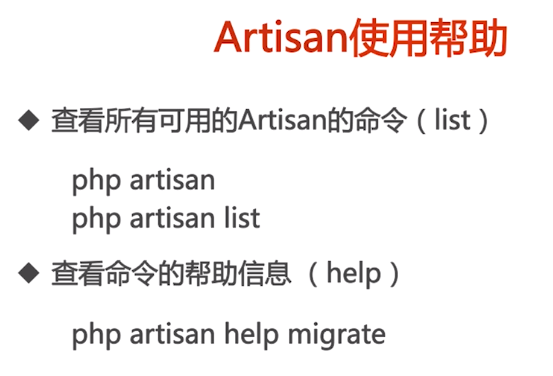
2.Artisan

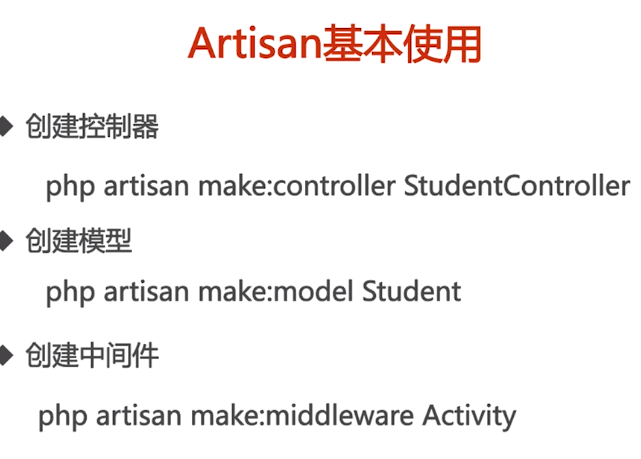
1.用户认证(Auth)
1. 生成Auth所需文件
1
命令:
1
php artisan make:auth
1
生成的路由内容:
1
2
3
<?php
Auth::routes();
Route::get('/home', 'HomeController@index')->name('home');
Auth::routes()位置:\vendor\laravel\framework\src\Illuminate\Routing\Router.php的auth函数:
1
2
3
4
5
6
7
8
9
10
11
12
13
14
15
16
17
18
19
20
    /**
     * Register the typical authentication routes for an application.
     *
     * @return void
     */
public function auth()
{
    // Authentication Routes...
    $this->get('login', 'Auth\LoginController@showLoginForm')->name('login');
    $this->post('login', 'Auth\LoginController@login');
    $this->post('logout', 'Auth\LoginController@logout')->name('logout');
    // Registration Routes...
    $this->get('register', 'Auth\RegisterController@showRegistrationForm')->name('register');
    $this->post('register', 'Auth\RegisterController@register');
    // Password Reset Routes...
    $this->get('password/reset', 'Auth\ForgotPasswordController@showLinkRequestForm')->name('password.request');
    $this->post('password/email', 'Auth\ForgotPasswordController@sendResetLinkEmail')->name('password.email');
    $this->get('password/reset/{token}', 'Auth\ResetPasswordController@showResetForm')->name('password.reset');
    $this->post('password/reset', 'Auth\ResetPasswordController@reset');
}
2.数据迁移 –> 在数据库生成对应的表
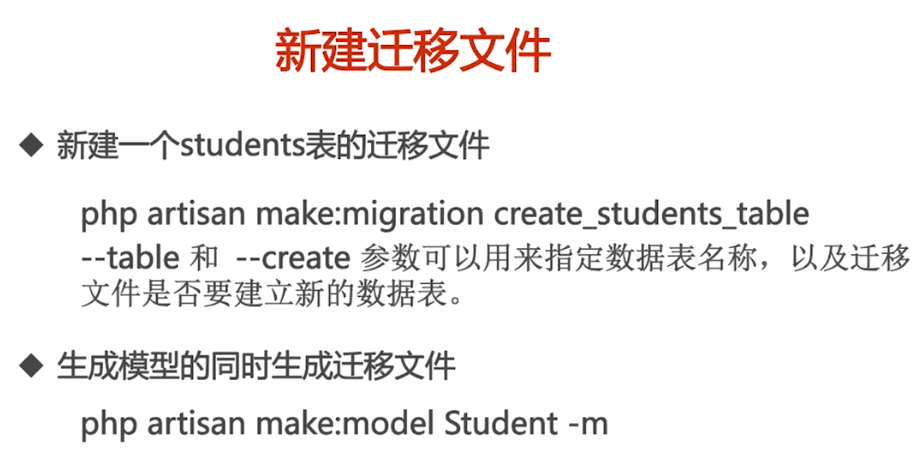
Mysql语句:
CREATE TABLE IF NOT EXISTS students(
	'id' INT AUTO_INCREMENT PRIMARY KEY,
    'name' VARCHAR(255) NOT NULL DEFAULT '' COMMENT '姓名',
    'age' INT UNSIGNED NOT NULL DEFAULT 0 COMMENT '年龄',
    'sex' INT UNSIGNED NOT NULL DEFAULT 10 COMMENT '性别',
    'created_at' INT NOT NULL DEFAULT 0 COMMENT '新增时间',
    'updated_at' INT NOT NULL DEFAULT 0 COMMENT '修改时间'
)ENGINE=InnoDB DEFAULT CHARSET=UTF8
AUTO_INCREMENT=1001 COMMENT='学生表';
1
完善迁移文件 --> **在`up`函数中添加数据表里的字段**:
1
2
3
4
5
6
7
8
9
10
11
12
13
14
15
16
17
18
19
20
21
22
23
24
25
26
27
28
29
30
31
32
33
<?php
use Illuminate\Support\Facades\Schema;
use Illuminate\Database\Schema\Blueprint;
use Illuminate\Database\Migrations\Migration;
class CreateStudentsTable extends Migration
{
    /**
     * Run the migrations.
     *
     * @return void
     */
    public function up()
    {
        Schema::create('students', function (Blueprint $table) {
            $table->increments('id');
            $table->string('name'); // unsigned()表示非负的意思
            $table->integer('age')->unsigned()->default(0);
            $table->integer('sex')->unsigned()->default(10);
            $table->integer('created_at')->default(0);
            $table->integer('updated_at')->default(0);
            $table->timestamps();
        });
    }
    /**
     * Reverse the migrations.
     *
     * @return void
     */
    public function down()
    {
        Schema::dropIfExists('students');
    }
}
1
将`database/migrations`下的迁移文件做迁移:
1
php artisan migrate
迁移步骤:
- 新建迁移文件:
php artisan make:model Student -m或者php artisan make:migration create_students_table --create=students。 - 完善迁移文件,即在
up函数里添加字段。 - 做迁移:
php artisan migrate
3.数据填充 –> 一般填充测试数据
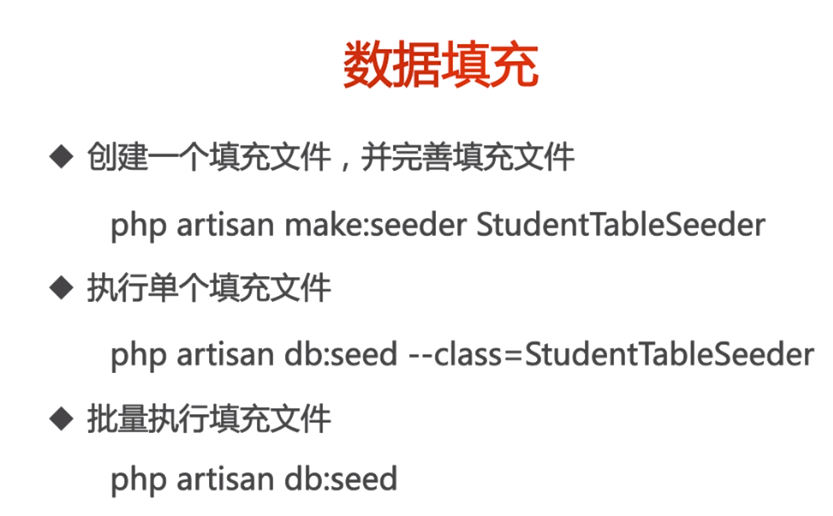
- 创建填充文件:
php artisan make:seeder StudentTableSeeder:
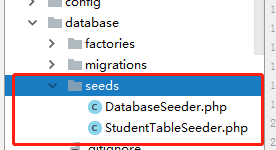
DatabaseSeeder.php:用于批量填充文件。
StudentTableSeeder.php:用于单个填充文件。
执行填充文件
- 单个填充文件:
1
2
3
4
5
6
7
8
9
10
11
12
13
14
15
16
17
18
19
20
     // \database\seeds\StudentTableSeeder.php
     <?php
     use Illuminate\Database\Seeder;
     use Illuminate\Support\Facades\DB;
     class StudentTableSeeder extends Seeder
     {
         /**
          * Run the database seeds.
          *
          * @return void
          */
         public function run()
         {
             // 导入两条数据
             DB::table('students')->insert([
                 ['name' => 'name1', 'age' => 23],
                 ['name' => 'name2', 'age' => 24],
             ]);
         }
     }
1
 执行:`php artisan db:seed --class=StudentTableSeeder`
- 批量填充文件:
1
2
3
4
5
6
7
8
9
10
11
12
13
14
15
16
17
     // \database\seeds\DatabaseSeeder.php
     <?php
     use Illuminate\Database\Seeder;
     class DatabaseSeeder extends Seeder
     {
         /**
          * Run the database seeds.
          *
          * @return void
          */
         public function run()
         {	// 将多个填充文件一起执行
             $this->call(StudentTableSeeder::class);
             $this->call(ArticleTableSeeder::class);
             $this->call(CommentTableSeeder::class);
         }
     }
1
 执行:`php artisan db:seed`
2.Laravel框架常用功能
1.文件上传
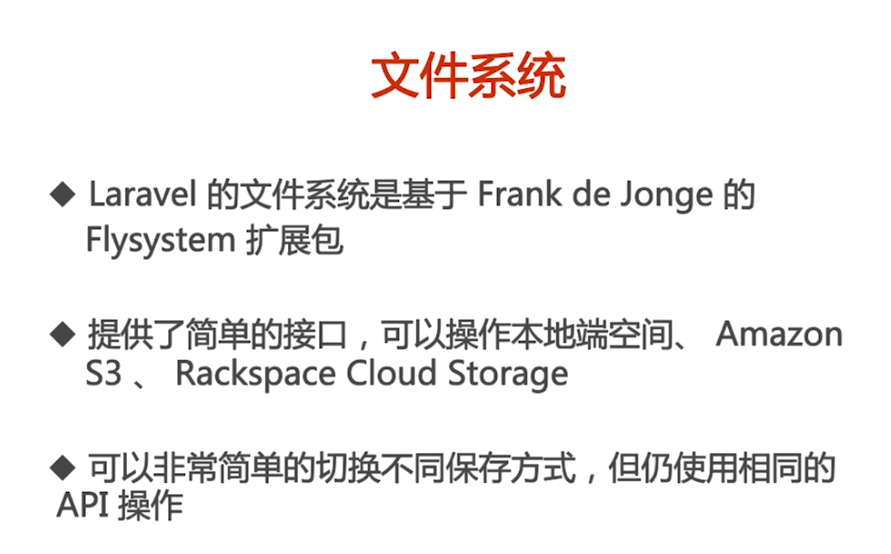

配置文件:
1
2
3
4
5
6
7
8
9
10
11
12
13
14
15
16
17
18
19
20
21
22
23
24
25
26
27
// config/filesystems.php
<?php
return [
	// 支持"local", "ftp", "s3", "rackspace",默认使用本地端空间
    'default' => env('FILESYSTEM_DRIVER', 'local'),
    'cloud' => env('FILESYSTEM_CLOUD', 's3'),
	// 磁盘
    'disks' => [
        'local' => [ // 本地端空间磁盘,名字叫local
            'driver' => 'local', // 驱动是本地端空间
            'root' => storage_path('app'), // 目录是storage/app
        ],
        'public' => [ // 本地端空间磁盘,名字叫public,因为驱动是本地端空间,所以它是本地端空间磁盘
            'driver' => 'local',
            'root' => storage_path('app/public'),
            'url' => env('APP_URL').'/storage',
            'visibility' => 'public',
        ],
        's3' => [ // 亚马逊的配置
            'driver' => 's3',
            'key' => env('AWS_KEY'),
            'secret' => env('AWS_SECRET'),
            'region' => env('AWS_REGION'),
            'bucket' => env('AWS_BUCKET'),
        ],
    ],
];
使用本地端空间来让laravel有文件上传的功能:
- 在
config/filesystems.php创建一个本地端空间磁盘,名字叫:uploads:
1
2
3
4
5
6
7
8
9
10
11
12
13
14
15
16
17
18
19
20
21
22
23
24
25
26
27
28
29
30
   // config/filesystems.php
   <?php
   return [
       'default' => env('FILESYSTEM_DRIVER', 'local'),
       'cloud' => env('FILESYSTEM_CLOUD', 's3'),
   	// 磁盘
       'disks' => [
           'local' => [
               'driver' => 'local',
               'root' => storage_path('app'),
           ],
           'public' => [
               'driver' => 'local',
               'root' => storage_path('app/public'),
               'url' => env('APP_URL').'/storage',
               'visibility' => 'public',
           ],
           'uploads' => [ // 创建了一个本地端空间磁盘,目录是storage/app/uploads
               'driver' => 'local',
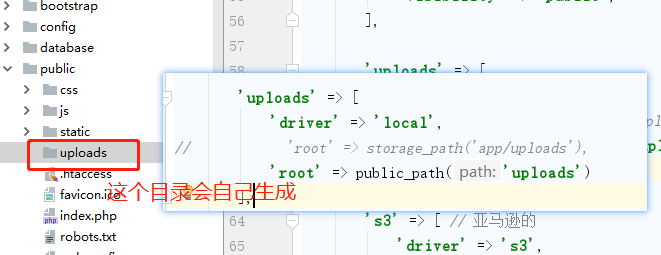
               'root' => storage_path('app/uploads') // 现在这里进行配置,这个文件夹会自己生成
           ],
           's3' => [
               'driver' => 's3',
               'key' => env('AWS_KEY'),
               'secret' => env('AWS_SECRET'),
               'region' => env('AWS_REGION'),
               'bucket' => env('AWS_BUCKET'),
           ],
       ],
   ];
位置:

- 控制器和路由:
1
2
3
4
5
6
7
8
9
10
11
12
13
14
15
16
17
18
19
20
21
22
23
24
25
26
27
28
   // StudentController.php
   <?php
   namespace App\Http\Controllers;
   use App\Student;
   use Illuminate\Http\Request;
   use Illuminate\Support\Facades\Session;
   use Illuminate\Support\Facades\Storage;
   class StudentController extends Controller
   {
      public function upload(Request $request) {
          if ($request->isMethod('POST')) {
              // 获取上传来的文件
              $file = $request->file('source');
              if ($file->isValid()) {
                  // 判断文件是否上传成功
                  $originaName = $file->getClientOriginalName(); // 原文件名
                  $ext = $file->getClientOriginalExtension(); // 扩展名,后缀
                  $type = $file->getClientMimeType(); // 文件类型
                  $realPath = $file->getRealPath(); // 临时绝对路径,还没手动保存之前文件存放的位置
                  // 这种做法保证文件名称都不相同
                  $filename = date('Y-m-d-H-i-s').'-'.uniqid().'.'.$ext;
                  // 保存文件在config/filesystems.php中设置的disk里,返回一个bool,保存得成功不成功
                  $bool = Storage::disk('uploads')->put($filename, file_get_contents($realPath));
              }
          }
          return view("student.upload");
      }
   }
1
2
   // web.php
   Route::get('/home', 'HomeController@index')->name('home');
- 视图里要提交文件的表单:
1
2
3
4
5
6
7
8
9
10
11
12
13
14
15
16
17
18
19
20
   // resources/views/student/upload.blade.php
   <div class="panel-body">
   	{{--enctype="multipart/form-data"必须加这个属性,表单才可以使用文件上传功能--}}
   	<form class="form-horizontal" method="POST" action="" enctype="multipart/form-data">
   		{{ csrf_field() }}
       	<div>
                <label for="file" class="col-md-4 control-label">请选择文件</label>
                <div class="col-md-6">		{{--name值是source--}}
                   <input id="file" type="file" class="form-control" name="source" required>
                </div>
            </div>
            <div class="form-group">
                <div class="col-md-8 col-md-offset-4">
                   <button type="submit" class="btn btn-primary">
                       确认上传
                   </button>
                </div>
             </div>
        </form>
   </div>
- 可以通过更改
config/filesystems.php里的uploads磁盘的空间为public目录底下的uploads目录。
